Free · No account · Saved on this device
Pool Pad Planner
Pick your equipment. The planner draws the pad, connects the plumbing, and writes your shopping list.
- 1Your pool
- 2Pick equipment
- 3See the pad
- 4Get the list
Tell us about the pool
Three quick answers. Everything can be changed later.
What kind of pool?
How big is the equipment pad?
Without a size the drawing is a concept: no pipe footage, no fit checks.
Which pipes come to the pad?
Volume sets the salt fill on the list. Not sure? Use the pool volume calculator.
Pick your equipment
Tap one in each row. Tap Own if you already have it, so it stays off the shopping list. Booster pumps, power supplies and fittings are added for you.
Need something else? Search the full catalog
Unscaled concept: enter the pad dimensions to get pipe footage and fit checks.
Tap anything to see its details. Drag to move it. Tidy up re-arranges everything in flow order.
Checks
Your shopping list
Everything the pad needs, minus what you already have.
Left to buy = needed − included with another product − what you own − what you bought. Prices are the ones you type in (plus The Pool Nerd store prices for Dolphin robots). Some links are affiliate links.
Real equipment, real rules
Typical footprints and service space for every model, plus the rules that matter: boosters for the cleaners that need them, salt cells after the heater, acid never meeting chlorine.
Plumbing done for you
The planner connects skimmer, drain, pump, filter, heater, cell and returns in the right order, routes the pipe and counts the elbows. Switch to Flow to read it like a diagram.
A list you can shop
Every row says why it is there. Mark what you own or bought and the total follows; nothing you purchased ever disappears from the list.
Planning guide How to plan an equipment pad Equipment order, cleaner differences, reading the flow diagram, plumbing options, and how the shopping checklist counts
How to Plan an Equipment Pad
Start with what you cannot move: the pipes that already come out of the ground, the wall or fence behind the pad, the gate you carry a filter cartridge through, and where power and gas arrive. Those go in first as connection points and markers. Everything else is arranged around them.
Then follow the water. Suction lines from the skimmer and main drain join and enter the pump. The pump feeds the filter. Filtered water goes through the heater, then any UV or ozone system, and the chlorine source goes last before the return. That order is not a style choice: unfiltered water fouls a heater, and chlorine-rich water straight from a salt cell or feeder attacks it.
Leave room to work. A filter that fits on the pad is not the same as a filter whose lid you can lift and whose cartridges you can pull. The Service clearance layer draws those envelopes so you can see where a pump basket, heater front, UV lamp or chemical tank refill needs space. A pad that is a foot wider often costs less than the service call it avoids.
Measure before you trust the numbers. With a pad width and depth entered, the planner measures routed pipe and counts elbows. Without them, the drawing is an unscaled concept and the checklist says so. The pool plans show finished pads for ten common layouts if you want to see where you are heading.
The Main Equipment Categories
- Circulation pump. Variable-speed pumps run slowly and quietly most of the day and speed up for cleaning or heating. Our best variable-speed pumps guide covers the models in the catalog. An existing single or two-speed pump can be mapped as owned equipment.
- Filter. Cartridge filters need no backwash valve and no waste line. Sand and DE filters backwash to waste, which means a legal place for that water. The pool filter guide compares the three.
- Heating. Gas heaters need a gas line, venting clearances and a check valve ahead of any chlorine feeder. Heat pumps need open air on every side. See best pool heaters and best heat pumps.
- Salt systems. A cell goes last in line, after the heater, with its flow switch and straight pipe per the manual, and a power center on the wall. See best salt chlorine generators.
- Dosing and feeders. Liquid chlorine and acid each need their own tank, pump, tubing and injection fitting, and they run only while the circulation pump runs. Tablet feeders are inline or offline and need a check valve. See best chlorine injection systems.
- UV, ozone and AOP. Supplemental treatment plumbs after the filter and often on a bypass. You still keep chlorine in the water.
- Cleaners. Robots, pressure-side and suction-side cleaners connect in three different ways, covered below.
- Monitoring. A smart monitor such as the Ondilo ICO reads ORP, pH and temperature from the pool. Store ORP in millivolts and keep free chlorine from a test kit as its own number in your chemistry log.
- Valves, pipe and fittings. Tees create branches and count as fittings. Two-way valves isolate lines, three-way valves divert pool and spa, and check valves stop backflow.
- Automation and power. Panels, timers and the sub-panel are markers on the wall so the electrician sees what needs circuits. Bonding is on every checklist.
Suction, Pressure, and Robotic Cleaners Connect Differently
A suction-side cleaner is pulled by the pump. Its hose goes to the skimmer or a dedicated suction line, and everything it picks up lands in the pump basket and filter. The planner connects it only to a suction endpoint and adds the hose, regulator and skimmer adapter the model ships with.
A pressure-side cleaner is pushed by filtered water. Some models need a booster pump on a dedicated line with a wall fitting; others run on the filter pump through a return. The booster rule is stored per model, so a Polaris 280 asks for its booster and a Polaris 360 does not. The booster feeds from after the heater and before the chlorinator, and it must be wired to run only when the filter pump runs. Our pressure-side cleaner guide explains the tradeoffs.
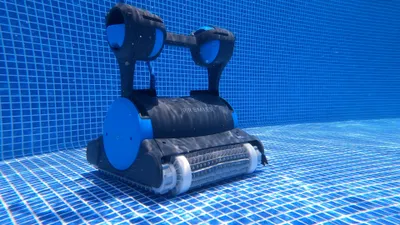
A robotic cleaner has its own pump and filter. It needs a power supply on a GFCI outlet at least ten feet from the water with a cable long enough to reach the far end, and optionally a caddy and spare fine filters. It adds no plumbing. The best robotic pool cleaners guide covers the Dolphin and Clear models seeded in the catalog.
Switching from a pressure cleaner to a robot removes the booster, the dedicated line fitting and the feed hose from the plan; the replacement preview shows exactly which rows change before you apply it.
Understanding the Water Flow Diagram
The Water Flow view redraws your connections as a schematic: suction sources on the left, the pump, the filter, then heating, treatment and chlorine devices in the order you plumbed them, and returns on the right. Waste paths branch off the filter, cleaner lines branch off the return side, and chemical feed, sample water and power show as thin dashed lines.
Boxes in the schematic are not the physical equipment, so moving things there is deliberately impossible. Change the operating mode in the top bar to see what is active: in filter mode the waste path is dim and raises no errors; in backwash mode it must have a destination; spa mode highlights spa suction and return.
The diagram is where order problems show up. A heater drawn before the filter, a salt cell upstream of a heater, or acid injected after chlorine each produce a conflict with a one-line reason.
Plumbing Appearance Options
Two different colors control the pipes. The diagram color belongs to a circuit (suction, return, waste, cleaner, chemical) and only helps you read the plan; you can override it per pipe and nothing on the checklist changes. The actual pipe appearance previews what you intend to install: white PVC, gray Schedule 80, black or painted, blue flexible, or a custom color, for the whole project, per circuit, with fittings matching or in their own color.
Appearance never establishes suitability. Material, size and pressure rating are set per pipe, and the checklist groups pipe by those, not by color. Drain-waste-vent fittings look like pressure fittings and are not.
Two lines that cross on the plan stay separate. A branch exists only when you add a tee or a three-way valve, which also puts that fitting on the list.
How the Shopping Checklist Works
Every row comes from something on the plan: a piece of equipment, a part the manufacturer says it needs, a route you drew, or a rule such as a check valve between a heater and a chlorinator. Open "Why" on any row to see the reason and jump to the object on the layout.
The quantity math is simple and visible. Required is what the design needs. Included is supplied by another selected package, such as the unions and gauge that come with a filter. Owned is what you already have, and purchased is what you have bought for this build. Remaining is required minus those three, never below zero, and each allocation is kept separately so a part is never deducted twice. Original accessories on owned equipment count only after you confirm they are present and reusable.
Pipe is grouped by size and material, totaled from the measured routes plus any vertical or off-page run you enter, increased by the allowance you choose, and converted into stock lengths. Buried and unknown runs are listed but not counted. Media comes from the manufacturer's documented charge; when we do not have it, the row says select filter media rather than guessing.
Prices are the ones you type in, plus The Pool Nerd store prices for the Dolphin robots we sell. When some rows are unpriced the budget is labeled Priced items subtotal. Optional upgrades start unselected, installation work sits in its own group to confirm with your installer, and anything you bought that a later change made unnecessary stays visible as surplus.
Accuracy and Tool Limits
The planner knows equipment order, connection rules, typical footprints and documented accessories. It does not know your soil, drainage, setbacks, wind, noise rules, electrical code edition, gas pressure, or pump curve. Flow-dependent decisions such as pump speed for a suction cleaner or minimum return pressure for a booster-free cleaner need the manual and, often, an installer. Treat every exported packet as a planning layout and verify site measurements, manuals, hydraulics, electrical and gas requirements, and local rules before installation.
Pool Pad Planner FAQ
Is the Pool Pad Planner free?
Yes. Every part of it works without an account: the layout, the flow diagram, the checklist, versions, exports and share links. Projects are saved in your browser on this device. Some product links are affiliate links, which may earn The Pool Nerd a commission at no extra cost to you.
Can I use it for the equipment I already own?
Yes. Choose Map my existing equipment, add each item with the I own this button, and mark the pipes that already arrive at the pad as connection points. Anything that is not in the catalog can be added as custom equipment with its own dimensions and ports. Owned equipment is never added to the shopping list, and its original parts are only credited once you confirm they are still present and reusable.
How accurate are the footprints and clearances?
They are typical published dimensions, good enough to see whether a pad is crowded and in what order things go. They are not shop drawings. Confirm every footprint, port location and service clearance in the manufacturer's manual before you pour a pad or cut pipe.
Why does the checklist say a quantity is estimated or unknown?
Pipe footage is measured from the drawn routes only when the pad has real dimensions. Vertical runs and anything that continues underground have to be entered by you. Media quantities come from the manufacturer where we have them; otherwise the row asks you to confirm the amount instead of inventing one.
Does a robot or an ICO add plumbing to the plan?
No. A robotic cleaner only needs a power supply within cable reach and a GFCI outlet; a cordless robot only needs a charger. The Ondilo ICO floats in the pool or sits in the skimmer and has no inline ports. Neither adds pipe, fittings or flow demand to the checklist.
Why will it not let me connect my suction cleaner to a return?
A suction cleaner is pulled by the pump, so it has to connect to the skimmer line or a dedicated suction line. A return pushes water out. The planner rejects the connection and explains why, the same way it rejects joining an acid line to a chlorine line.
Does every pressure cleaner need a booster pump?
No. The rule is stored per model. The Polaris 280, 3900 Sport and Quattro P40 need a booster on a dedicated line; the Polaris 360 and MAXX run on the filter pump. Pick the exact cleaner and the planner tells you whether a booster, a dedicated line and a wall fitting belong on the list.
What happens to my purchases if I change the layout?
Nothing is lost. If you bought four elbows and the new route needs six, the row shows six needed, four purchased, two remaining. If a part is no longer needed it moves to a surplus group instead of disappearing. Restoring an older version restores the equipment and geometry and then reconciles it against your current purchases.
Can I share a plan or move it to another device?
Yes. The read-only share link carries the design itself, so anyone who opens it gets their own copy. For a full backup including purchases, prices and versions, export JSON and import it on the other device.
Does the planner size my pump, filter or pipe?
No. It checks order, connections, fit, clearances and model-specific requirements, and it counts what the drawing needs. Flow and head depend on the pump curve, the pipe and your site, so sizing stays with the pump size calculator, the manufacturer's curves and your installer.

Disclaimer: The Pool Pad Planner is a planning aid. Footprints, clearances and quantities are typical values and rule-of-thumb estimates, not a cutting list or an engineered design. Confirm every dimension against the manufacturer's manual, measure your site, and have licensed trades handle gas, electrical and bonding.
Four ways to plan
Start with an idea. Leave with a builder brief.
Browse designs, test your choices in the 2D tool, compare the closest example plans, then lay out the equipment pad. Everything here is free and works without an account.
Pool Designs
See 29 shapes and layouts, with the space, cost, and upkeep tradeoffs called out.
Compare designs → Step 2 · ConfigurePool Designer
Choose the dimensions, features, finishes, and equipment, then save a summary.
Build your concept → Step 3 · PlanPool Plans
Compare 10 examples with equipment, plumbing, electrical, and deck notes.
Compare example plans → Step 4 · EquipmentPool Pad Planner
Choose the equipment, arrange the pad, connect the plumbing, and get a shopping checklist.
Current stepMore from The Pool Nerd